Install and Configure MCP Servers
The Model Context Protocol (MCP) is how Wayland gains tools beyond the eight built in. An MCP server exposes a set of tools (a database client, a browser, a search API, a code platform), and once connected those tools become available to your assistants. Connected MCP tools also inject into Claude Code and Codex sessions that Wayland manages, so the same server you install once works across all your connected agents.
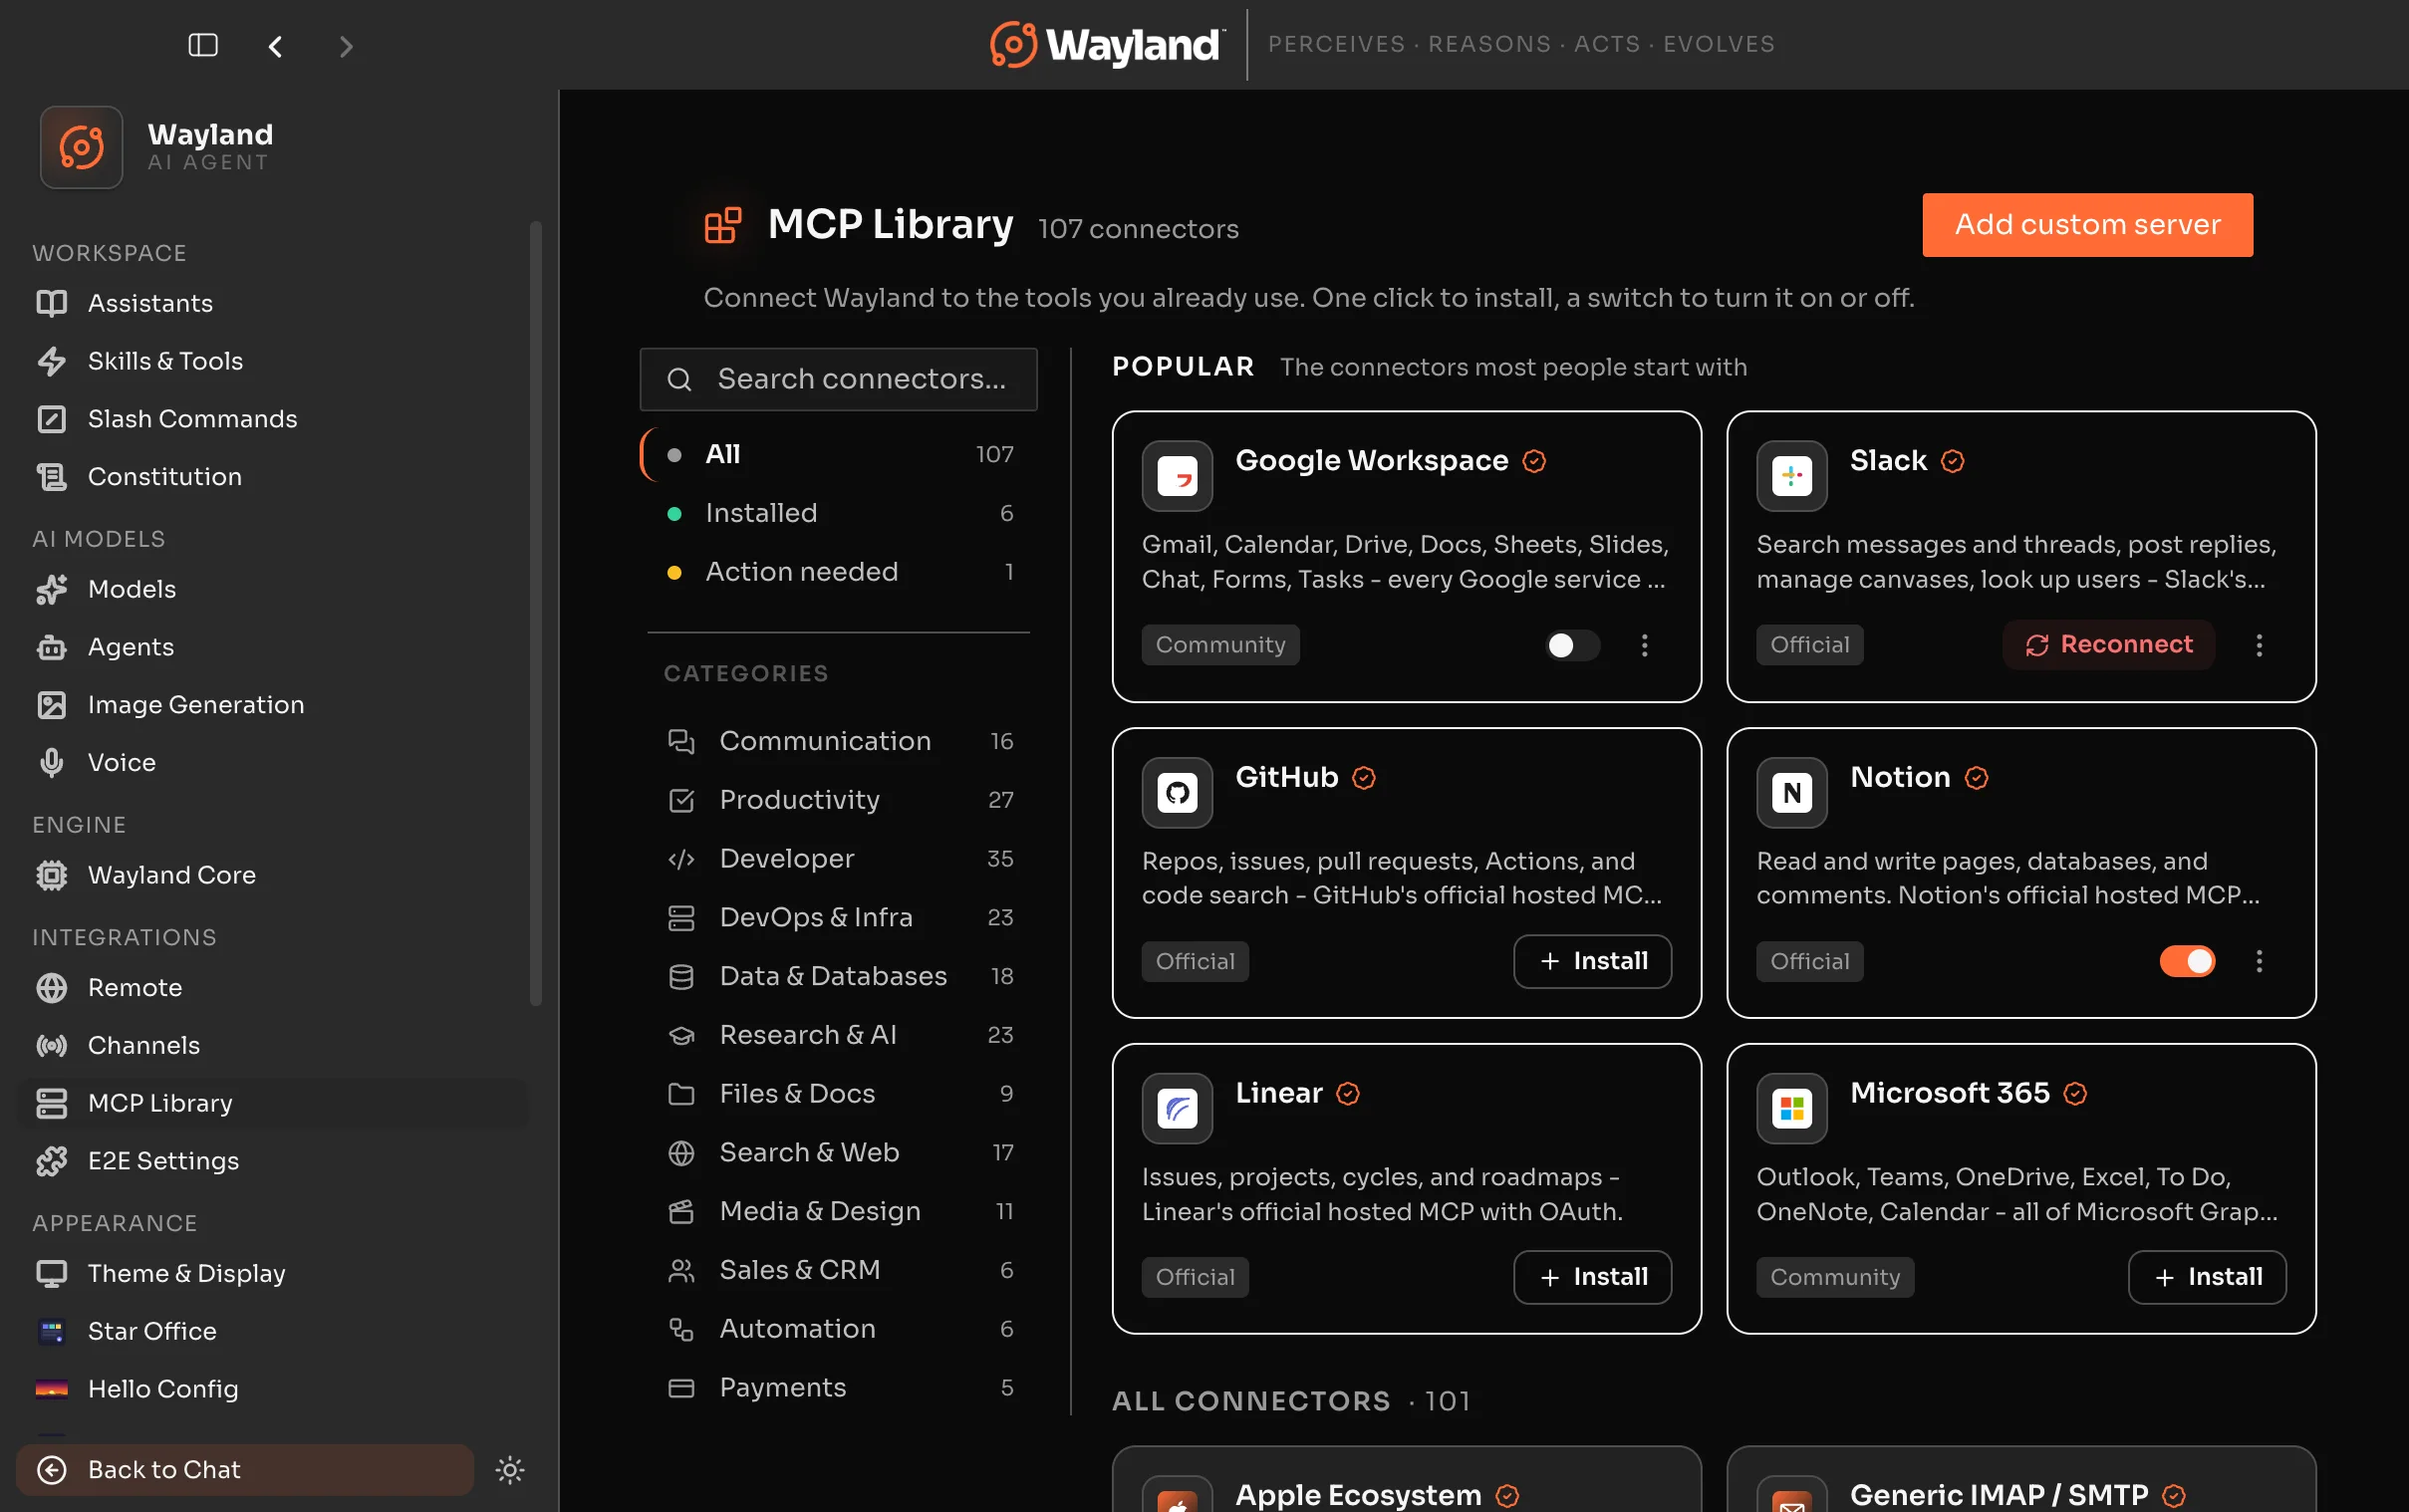
Browse the catalog
Section titled “Browse the catalog”The MCP Library ships 107 curated servers covering databases, cloud platforms, productivity tools, AI services, and more.
- Open Settings > MCP Library.
- The Browse page shows cards for every server in the catalog. Use the category rail on the left to filter by type.
- Click a card to open the Detail page. The detail page shows what tools the server provides, what authentication it needs, and any setup steps.
Install from the catalog
Section titled “Install from the catalog”From the Detail page:
- Review the tools and authentication requirements.
- Click Install.
- If the server needs credentials (an API key, OAuth, or local credentials), a setup guide appears. Follow it to complete the connection.
Installed servers appear on the Installed page at Settings > MCP Library > Installed, where you can manage, sync, or remove them.
Connect any server by URL
Section titled “Connect any server by URL”To connect a server that is not in the catalog, paste its URL. Wayland auto-probes the transport and authentication in one step.
- In Settings > MCP Library, choose Add server.
- Paste the server URL. Wayland probes the URL to detect the transport (SSE or streamable-http) and what authentication the server requires.
- Add any required API keys or headers if prompted.
- Save.
For servers that launch as a local process rather than a URL, use the JSON editor (reachable from the same Add server flow via “Use JSON”). Provide the command, arguments, and any environment variables the process needs.
Sync to agents
Section titled “Sync to agents”After installing a server, sync its tools to the assistants and agents that should use them from the Detail page. The “Available to” section shows which agents currently have the server. Keeping a server off agents that do not need its tools keeps each agent’s tool set focused.
Connected MCP tools are available in:
- Wayland assistants you sync the server to.
- Claude Code sessions managed by Wayland.
- Codex sessions managed by Wayland.
Built-in browser capability
Section titled “Built-in browser capability”You do not have to install anything to give an assistant a browser. Wayland bundles a built-in browser capability (a Playwright MCP server) and auto-enables it, so an agent can open pages, click, fill forms, and extract what it needs out of the box. It shows up as a connected server like any other, and you can sync it to the assistants that should have it from the same flow above. Because it ships with the app, there is no separate setup step to get web browsing working.
Defer heavy servers
Section titled “Defer heavy servers”A server can be marked deferred so its tool schemas load only when needed rather than at startup. This keeps launches fast when you have many servers connected. The agent finds deferred tools on demand through ToolSearch.
Verify the connection
Section titled “Verify the connection”The MCP status display on the Detail page shows whether the server connected and its tools registered. If a server fails to start:
- For URL-based servers, confirm the URL is reachable and the credentials are correct.
- For stdio servers, check the command, arguments, and environment variables.
For common issues, see Troubleshooting.
The same in the engine
Section titled “The same in the engine”Wayland Core connects to the same servers through config rather than a UI. Define them under [mcp.servers.*] in your config file. See Configuration for the format.